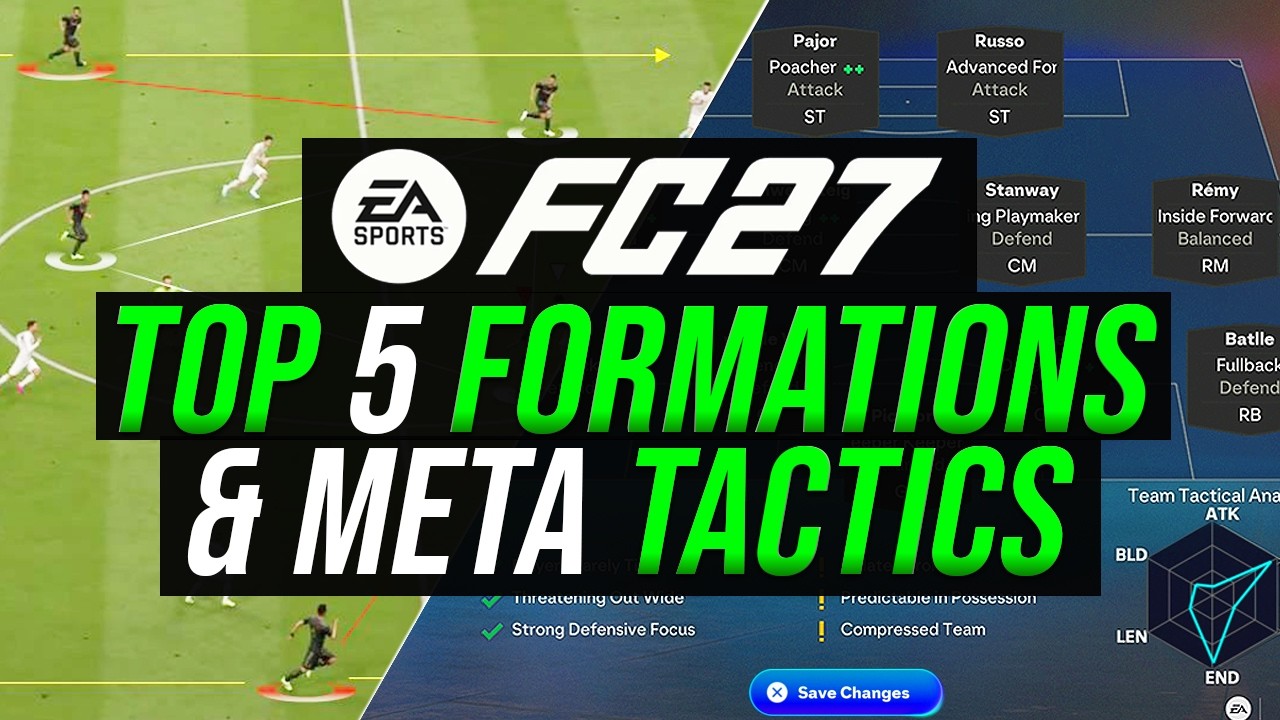
Best FC 27 Formations: The Top 5 Meta Tactics with Roles and Codes
I’ve been testing shapes since launch week. Here’s my honest ranking of the best formations in FC 27, who each one suits, and the exact custom tactics, player roles and codes I’d start with.

Table of Contents
In this article we’re going to go over the best tactics in FC 27 and what actual custom tactics should you use and what formations you should be using depending on your playstyle to help you get the best performance. Because the truth is, everyone has a different playstyle. Although some things are more META than others, it all depends on how you play.
If you’re searching for the best FC 27 formations, you’ve probably already copied a pro’s code and wondered why you’re still losing. This is a very common thing that people do, is they just copy tactics codes and then they end up just keep changing tactics every single week. If this is you, then this is the perfect in-depth knowledge that you need to know. Every September a new FC comes out, everyone grabs the same meta tactic, and a week later half of them are stuck in exactly the same division.
What I’ve learnt over the years is simple: a formation is a tool, but at the of the day you need to put the work in as an expert. Giving someone a professional player tactic is a bit like handing a learner driver the keys to a racing F1 car. The car may be very fast, but if you can’t control it, it’s not the car’s fault. What I’m trying to explain here is, if you are still losing inside the game or you’re changing tactics, understand it’s your gameplay, not the tactics itself. But sometimes it could be because you just don’t understand what the tactics are for and how to use them properly. You would play a wide formation if you’re pressing, but you may play a narrow formation when you’re trying to go down the middle. There’s different use cases and different tools for different jobs.
So I’m going to give you five top formations that I rate very high in FC 27. Instead of just giving you the codes, I’m also going to go through the different details and make sure you check out the videos as well, which will cover the different variations that I suggest depending on your gameplay.
For each one I’ll explain who it suits and share the full custom tactics with player roles and focuses. I’ll also point out the changes I’d make depending on your level. Something that works for a player in Division 3 can fall apart completely in Division 8, and that’s normal.
Quick note on Division Rivals before we start. If you’re around Division 7 at the moment in the early stages of the year, don’t panic. Everyone is piling into the same divisions in the first couple of weeks, so one game you’ll face someone who’s barely played and the next you’ll get battered by an Elite player on their way up. It settles down eventually over time.
Watch the Full FC 27 Formations Breakdown
4-1-2-1-2 Narrow: The Best FC 27 Formation for Tiki Taka
I’ll start with the one I have the most fun with. If you enjoy quick passing through the middle, the 4-1-2-1-2 Narrow might be the best formation in FC 27 for it. With all the spinning and close control dribbling going on this year, having loads of bodies packed centrally gives you little passing triangles everywhere.
The roles are what make it tick. One striker is an Advanced Forward who stays on the shoulder, while the other plays as a False 9 and drops in to link play. Behind them, the CAM is a Shadow Striker who bursts past the False 9 into the space he leaves. In midfield I’ve got a Box to Box on Balanced, a Playmaker on Attack and a Holding player sitting in front of the back four. I run the build up on Counter, which might sound odd for a passing formation, It works because the moment you win the ball back in that crowded middle, your runners are already going forward driving forward for the counter attack.
There’s a sneaky defensive upside too. Because you’ve crowded the middle, anyone who isn’t comfortable switching play wide will just keep running into traffic. I’ve honestly had games where I defended better with this than with a far wider shape. Of course it depends what formation your opponent is running, but that’s why many people actually find it easier to defend the narrow formation because if your opponent is also playing narrow or going down the middle, you have more players in the central column, which makes it easier to defend for some people.
The downside is obvious though. There are no wide midfielders. A decent opponent will spot that within ten minutes, overload one flank and start doubling up on your fullback. When that happens, you have to take control of the nearest centre mid yourself and drag him across to cover the wide areas. If you’re somewhere between Division 10 and Division 3, I’d happily tell you to use it, because most people you face won’t punish it. Against Elite players or anyone who really knows what they’re doing, I’d save it for certain spells of a match rather than starting with it.

| Formation | 4-1-2-1-2 Narrow |
| Code | ywLckWM48uPC |
| Build Up Style | Counter |
| Defensive Approach | Balanced |
| Line Height | 37 |
Player Roles and Instructions
| Position | Role / Instruction |
|---|---|
| LST | Advanced Forward (Attack) |
| RST | False 9 (Attack) |
| CAM | Shadow Striker (Attack) |
| LCM | Box to Box (Balanced) |
| RCM | Playmaker (Attack) |
| CDM | Holding (Defend) |
| LB | Fullback (Defend) |
| RB | Fullback (Defend) |
| LCB | Defender (Defend) |
| RCB | Defender (Defend) |
| GK | Sweeper Keeper (Balanced) |
Watch the full 4-1-2-1-2 Narrow breakdown on YouTube
4-2-3-1 Wide: The Most Defensive Meta Formation in FC 27
If defending is where you keep losing games, this is the one I’d send you to. You get two CDMs sat in front of the back four, a Holding player and a Deep Lying Playmaker on Defend. Your LCDM/RCDM stay back, so they’re already in position to help prevent you getting counter attacked, and with LM/RM sitting deeper than wingers, you can help to avoid getting doubled up on the wings. With a central cam as well, you have a player that basically integrates your play together. This is the perfect defensive formation. If you’re looking for a formation perhaps to close out the game, or maybe your opponent’s playing wide and you need a player to cover every aspect, this is the perfect formation to use.
The easiest way to think about it is a 4-4-1-1 with CDMs instead of centre mids. So if you like the 4-4-1-1 further down this list but many will find this too open. This is because centre mids are higher than CDMs, and that’s why a lot of people, maybe a lot of professional players use it. That’s because they like to press with centre mids. So if you’re good at defending and pressing, then it’s a different situation. Otherwise, I’d recommend CDMs. You could always use a 4-4-1-1 or have it in your tactics slots (You can have up to 5 tactics saved at any given time.
Here’s a tip I lean on a lot. The CAM is playmaker by default, and the benefit of this is if you put a playmaker on build-up, they sit a bit deeper in the attacking stance, so you can always right stick switch to them and use them to help you defend, to have a five-bank midfield. However, personally speaking, I use a shadow striker. One of the biggest caveats with this formation is your striker can sometimes be isolated, and putting a player on a shadow striker means that in the build-up play they act as a CAM, but when you’re attacking it actually plays as a striker. So sometimes this formation, depending on where the ball is, acts like a 4-4-2 in the final third.
Although a Playmaker on the Build-up Focus sits deeper and you can always right stick switch to him, I would still prefer to use a shadow striker first, but if you want to make this formation more defensive as your closing out formation, feel free to make that change. This one depends on your playstyle. I would say give both a try and see which one you prefer. If you find that one striker is too difficult to attack because that one striker is isolated, then I would definitely recommend a shadow striker.
There’s also a narrow version of the 4-2-3-1, however in the 4-2-3-1 the structure is the same, but you have wide CAMS instead of LM/RMs. These two CAMs actually play out wide during matches, so you need quick players or wingers who are comfortable in a CAM slot. It’s the more attacking of the two, but I would say the 4-2-3-1(2), the key being (2), the second variation, has LM/RM that sit deeper.

| Formation | 4-2-3-1 Wide |
| Code | %Qm4s&mWYMaN |
| Build Up Style | Balanced |
| Defensive Approach | Balanced |
| Line Height | 37 |
Player Roles and Instructions
| Position | Role / Instruction |
|---|---|
| ST | Advanced Forward (Attack) |
| CAM | Shadow Striker (Attack) |
| LM | Inside Forward (Balanced) |
| RM | Inside Forward (Balanced) |
| LCDM | Holding (Defend) |
| RCDM | Deep Lying Playmaker (Defend) |
| LB | Fullback (Defend) |
| RB | Fullback (Defend) |
| LCB | Defender (Defend) |
| RCB | Defender (Defend) |
| GK | Goalkeeper (Defend) |
Why Trust NealGuides:
NealGuides is a gameplay expert with one of the biggest tutorial channels for EA FC 27. He has repeatedly predicted powerful META mechanics in advance and turned them into practical guides that help players improve. He is also one of the very few members that are part of the EA Design Council, in which he travels to EA headquarters multiple times per year to play the game and provide feedback, and as a consultant.
Through his 20 years of extensive football simulation knowledge, he now focuses on helping the average player get better at the game. He has coached tens of thousands of people exclusively through his FC School, and his YouTube channel boasts over 300,000 subscribers, with over 100 million views across all platforms.
Best known for his tactics, he breaks down each tactic and formation, exploring the different variations and adjustments for the viewer’s style. All his formations that he releases are tested by him and members of different skill levels before being released.
4-4-1-1 Midfield: The Balanced FC 27 Custom Tactic
What this tactic is, is the halfway point between a 4-2-3-1(2)/4-2-1-3 and a 4-4-2. I want you to think of this formation as the halfway point between them. Some of you may prefer the 4-4-2, but some of you may find that the 4-4-2 is too attacking. You may equally also find that the 4-2-1-3 is also too defensive. This is the middle ground. We talked about how in the 4-2-3-1(2) aka 4-2-3-1 second variation has two CDMs. In this situation there’s two centre mids. So it’s the exact same formation as the formation above, except for you two CMs.
Now this is the really important differentiating factor. This is the example that we took from a pro player that we just modified slightly. The CAM, just like the formation above, remains the same. Whether you decide to use a shadow striker or playmaker on balanced, not build-up this time, depends purely on your play style. But understand this has centre mids, so it’s much harder to defend in this formation. But then the benefit of this is it makes it easier for you to press your opponent. So if you’re perhaps in the game and maybe you’re losing and maybe you need to apply pressure, or perhaps your opponent is holding the ball, then the two centre mids sitting higher up the pitch makes it easier for you to press. So you may prefer this instead of CDMs if you are losing. But understand you might be a bit more attacking, but you do lose on the defensive side.
The 4-4-1-1 does have some good strengths, the key is those CMs that can be more attacking. As you can see on the left center mid, Schweinsteiger is on a box-to-box ball-winning. This makes them slightly aggressive on the defensive phase, you could argue in theory, although it is the attacking role. But think of them when they’re in attacking phase and you lose the ball, because they’re in a box-to-box, that means they’re going to run inside the box and make those late runs into the box. Think about a Lampard-type player someone that can do a bit of “everything”. So the key with this formation is you can make the center mids more attacking. With the CDM variation, you can technically use the box crasher role, but I feel like the box-to-box movements are just a bit more fluid.
The line height in this version sits at 37. What I would say is I don’t know who’s reading this. You could be a Division 1 player, or you could be a Division 10 player. I would start with a lower depth. I know right now, technically a high depth and using extreme is actually very meta, but I’d rather use a bit of a conservative approach around 37, which is quite a defensive approach without going into too deep territory. And you can always move that slider up depending on how you feel. Like I say, it’s almost like a seat in your car. Everyone has different seat positions. Someone may be 5’5″. Someone may be 6’5″. The key thing is adapting it for your gameplay and your style.

| Formation | 4-4-1-1 Midfield |
| Code | u##Y1ku&4qjs |
| Build Up Style | Balanced |
| Defensive Approach | Balanced |
| Line Height | 37 |
Player Roles and Instructions
| Position | Role / Instruction |
|---|---|
| ST | Advanced Forward (Attack) |
| CAM | Shadow Striker (Attack) |
| LM | Inside Forward (Balanced) |
| RM | Inside Forward (Balanced) |
| LCM | Box to Box (Ball Winning) |
| RCM | Holding (Defend) |
| LB | Fullback (Defend) |
| RB | Fullback (Defend) |
| LCB | Defender (Defend) |
| RCB | Defender (Defend) |
| GK | Sweeper Keeper (Balanced) |
Watch the full 4-4-1-1 breakdown on YouTube
4-2-1-3: The Best FC 27 Formation for Most Players
This is the next formation that you may see me allude to above. The only difference between this and a 4-2-3-1(2) is that you have left wings and right wings instead of left midfielders and right midfielders.
Now these wingers are more attacking, and you can argue that they do have better AI movement. It depends on how you look at it contextually. But they sit a bit higher. They don’t come back as deeper defensively. So this is really a good counter-attacking formation. This is probably a newbie-friendly formation. If someone is new to the game, this would be the formation that I recommend, because it’s very easy to use. You have still the same system as a 4-2-3-1(2), but your Wingers stay higher up the pitch, which makes it easier for counter-attacks. It makes them more attacking. They position a bit better as well. So the most important thing with this one is understanding it’s the best formation for most players. If you were to get into the game and you never played the game before, this is the formation to use because it encompasses everything.
You do have two CDMs that helps you on the defensive end. You do have the wingers. You also have that central CAM as well as a shadow striker. So you don’t have any areas that are scanty in players when you’re attacking, but you can still play in the narrow columns just as well as the wider flanks.
You may see professional players sometimes use this. They normally use this when the game comes out, and a lot of them still use it. However, they normally go towards the higher-end formations. Because for them, they have that level where they know how to defend and they know how to attack. But for someone that’s not at that level, this is the perfect formation to use as a base template.
If you want the full setup built around a cheap squad, I’ve covered it in my FC 27 best 4-2-1-3 custom tactics guide.

| Formation | 4-2-1-3 |
| Code | zYPzUdN59v@y |
| Build Up Style | Balanced |
| Defensive Approach | Balanced |
| Line Height | 37 |
Player Roles and Instructions
| Position | Role / Instruction |
|---|---|
| ST | Advanced Forward (Attack) |
| LW | Inside Forward (Balanced) |
| RW | Inside Forward (Balanced) |
| CAM | Shadow Striker (Attack) |
| LCDM | Deep Lying Playmaker (Defend) |
| RCDM | Holding (Defend) |
| LB | Fullback (Defend) |
| RB | Fullback (Defend) |
| LCB | Defender (Defend) |
| RCB | Defender (Defend) |
| GK | Goalkeeper (Defend) |
Watch the full 4-2-1-3 breakdown on YouTube
4-4-2 Flat: The Best Formation in FC 27 (If You Can Handle It)
The 4-4-2 is my personal favourite and it’s top of my list. It seems to finish in the top four or five formations every year, whatever anyone tells you, and you’ll see plenty of pros running it. I love it because I like to play on the front foot. It’s also the hardest formation on this list to play well, so please read this bit properly before you copy anything.
There are two big problems with it. First, your strikers stay high and barely help out when you’re defending. That’s been the case for a few editions now, since the game stopped strikers dropping back since FIFA 20, so you’re really defending with two banks of four and nobody else.
Second, there’s no CAM, which leaves a huge gap between your midfield and your front two when you’re trying to build up. This makes it very difficult for you to bring the ball from your midfielders to your strikers if you don’t have that ability to manoeuvre the ball quickly.
Some people fix that by putting one striker on False 9 so he drops in and acts like a makeshift CAM. I get why, but for me it takes away the whole point of the formation. In that situation, I would personally use a 4-4-1-1. There’s a few off examples which players do like to use a false nine, and that’s simply because of the lob through ball meta, and sometimes someone’s sitting a bit deeper, you can trigger them to make a run going forward and you can time the lob through ball in behind. But again, this is very specific scenarios and cases, and that’s why you will see pro players using different roles depending on how they play.
I want both strikers up there, so I pair a Poacher with an Advanced Forward, both on Attack. I feel that you get two different types of attacking movements, which is the best of both worlds and you can always decide what you prefer after.
When I’m facing someone who sits back with two CDMs, having two forwards pinned against their defence gives me two passing options straight away, as soon as I turnover play and win the ball back.
If I was to use Pinged Pass I can easily distribute the ball to my strikers as its very effective to bring the ball forward.
My fix for the gap is in midfield instead.
One CM is a Playmaker on Attack, so he drifts forward, fills that “10” hole a bit, (note: they wont play like an actual CAM), but it gives someone in that middle role.
The other CM is a Deep Lying Playmaker on Defend who stays back and keeps things steady and ready for recycling the ball around my opponent box or there to neutralise the counter.
Where the 4-4-2 really shines is pressing. The code is set to Balanced, but switch the defensive approach to Extreme, or use Team Press, and it becomes a proper pressing machine. I’d suggest a line height of around 37 for most people, as I said conservatively start there and then move it up.
I play mine around 60, if I am using this formation normally, if I am trying to press I use 95 with Extreme and Team Press, but I’m comfortable defending manually and I’m happy to take big risks to win the ball high and counter. If that isn’t you yet, keep this one in your back pocket for when you’re chasing a game. Two goals down with twenty minutes left? That’s exactly when I’d switch to it.

| Formation | 4-4-2 Flat |
| Code | s4Gy16uy2ohq |
| Build Up Style | Balanced |
| Defensive Approach | Balanced (switch to High to press) |
| Line Height | 37 (50 to 60 if you defend well manually) |
Player Roles and Instructions
| Position | Role / Instruction |
|---|---|
| LST | Poacher (Attack) |
| RST | Advanced Forward (Attack) |
| LM | Inside Forward (Balanced) |
| RM | Inside Forward (Balanced) |
| LCM | Playmaker (Attack) |
| RCM | Deep Lying Playmaker (Defend) |
| LB | Fullback (Defend) |
| RB | Fullback (Defend) |
| LCB | Defender (Defend) |
| RCB | Defender (Defend) |
| GK | Sweeper Keeper (Balanced) |
Watch the full 4-4-2 breakdown on YouTube
How These FC 27 Formations Fit Together
If you look closely, three of these formations are basically the same skeleton. The 4-2-1-3 is the defensive version, the 4-4-1-1 is the middle ground and the 4-4-2 is the attacking one. The 4-2-3-1 Wide is the extra safe option when you need to shut up shop. That’s why I’d keep more than one of them in your custom tactics. Start a match in the shape you trust, then shift up or down depending on the score and how your opponent is playing.
If you want a narrow formation add the 4-1-2-1-2(2) in, but you may need to make some tactical changes to get players to fit in the roles. In case you’re wondering as well, a player can still play out of position. It’s not like last year where they just stand there and do nothing. They have some basic movement nowadays. So sometimes it’s not the end of the world playing someone out of position, as long as you don’t have to trigger that player manually.
Changing formation between phases of a game is a skill in itself, and it’s one most players never bother with. The key is learning when to change tactics and when to change formation.
If you’re wondering throughout the year and you want to update a list of all the tactic formations and codes, including professional players’ tactics that I review, then please see the full list of custom tactics which includes all the codes.
Key Takeaways
- A copied code won’t carry you on its own. Adjust every tactic to your own level and the way you like to play.
- The 4-2-1-3 is the best all round FC 27 formation for most players, thanks to two CDMs that give you more time to recover.
- The 4-4-2 Flat is the strongest formation in the right hands and a brilliant pressing option when you’re chasing a game.
- The 4-4-1-1 Midfield with a Shadow Striker gives you a solid midfield in build up and a front two in the final third.
- If defending is your weakness, the 4-2-3-1 Wide is the safest shape without switching to a back five.
- The 4-1-2-1-2 Narrow is great fun for tiki taka football but can be exposed on the flanks by better opponents.
- Always start conservative with your defensive settings. You can push up later, but it’s hard to recover from an early hammering.
Join my FC School Series. Guaranteed improvement in one month, or your money back. Videos in a structured format, everything from the fundamentals to the META. Updated regularly. If you do not get better after one month, we will refund your money, its as simple as that you have nothing to lose. Find out more information at LearnFC.com
FAQ
FC 27 Formations: Quick Answers
What is the best formation in FC 27?
For skilled players, I rate the 4-4-2 Flat as the best formation in FC 27. For most people, the 4-2-1-3 will win you more games because the two CDMs make defending far easier.
What is the best FC 27 formation for beginners?
The 4-2-1-3. It’s forgiving, well balanced and it’s the formation I recommend every year to anyone who’s new or struggling.
What is the most defensive formation in FC 27?
The 4-2-3-1 Wide. Two CDMs plus a left and right midfielder give you plenty of cover without dropping into a back five.
Should I use Extreme Depth or 90/95 Depth?
95 depth, or extreme depth, is a very effective technique because your players use auto offside traps and they keep the defensive line pushed up. This is very beneficial because currently, as it stands, there’s a bug inside the game where your fullbacks tend to keep your other players offside. This is also a very effective way of defending because your team effectively auto-press, almost like the team press was back a few years ago.
But I would say use this with extreme caution. A lot of top-tier players can use this because they still right stick switch and they defend properly. The problem is a lot of players like to use this, but they don’t know how to defend. So if you are going to use extreme depth, and yes it is a very viable tactic and it is very effective, but you need to be able to right stick switch to your defenders because lob through balls are so potent this year, and any top-tier player that sees if you can’t defend will just start using lob through balls in behind. And if your defensive line sits so far ahead, you’re giving more space for your opponent to then run in behind. So it’s up to you to run back with your defender and bring the goalkeeper out if need be.

NealGuides
NealGuides is an EA SPORTS FC tutorial creator and gameplay coach with 300,000+ YouTube subscribers. He specialises in breaking down FC gameplay, tactics, mechanics and decision-making for players from beginner through to Elite and competitive level.
Neal is a member of the EA Gameplay Design Council and has taken part in early EA SPORTS FC gameplay testing and feedback, including visits to EA. He remains independent and uses extensive gameplay testing, coaching and analysis to create his FC 27 guides.